SooSL can provide glosses and translations in more than one written language. You can choose which written language(s) you want to see and in what order. How this works is different in the SooSL Web and SooSL Desktop. Why? In SooSL Web you can only view a dictionary, but in SooSL Desktop you can change it. That means SooSL Desktop offers more choices.
You can change what written languages you see. To do so, click ![]() Written languages in the toolbar. You will see a dialog showing what languages are available.
Written languages in the toolbar. You will see a dialog showing what languages are available.
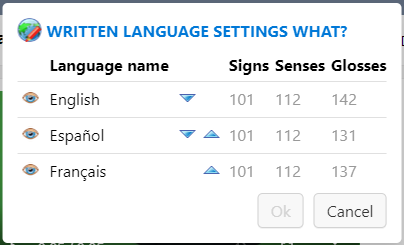
This dialog controls the written languages in the senses and notes. (To choose the written language in the gloss list, look just above the gloss list for a language choice.)
This dialog also tells how many signs, senses, and glosses are in each language.
You can change what written languages are in a dictionary project and which ones you see. To do so, click ![]() Tools >
Tools > ![]() Written languages. The Written Language Settings dialog will open up. Then, click
Written languages. The Written Language Settings dialog will open up. Then, click  .
.
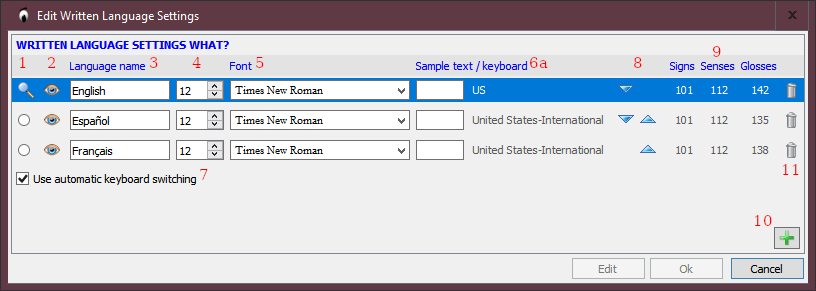
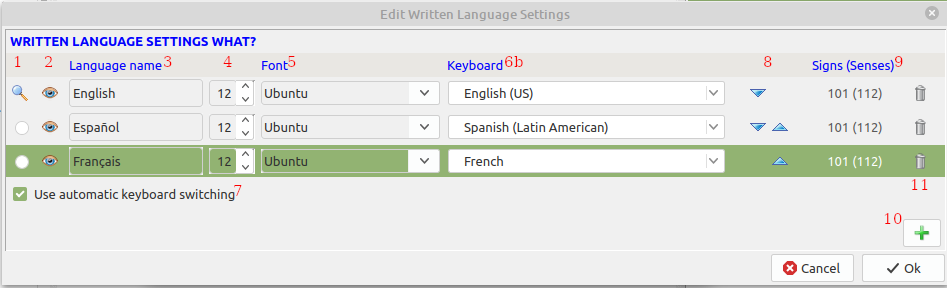
The Edit Written Language Settings dialog looks a little different in Windows/Mac vs. Linux.
|
Windows and Mac |
|
|
|
Linux |
|
|
You can control several things about a written language (look at the red numbers in the pictures above):
See also the extra help topic on keyboards.
 7. Normally leave it turned on (checked). If it isn't working right, you can turn it off, but then you will need to change the keyboard yourself as you move from one field to another.
 To save your changes, click  . If you change your mind and decide not to make any changes, click
  .
.
You can add written languages to your dictionary project. You may add as many as you need.
To add a new language, click ![]() (#10 in the pictures above). A new row will appear in the list.
(#10 in the pictures above). A new row will appear in the list.
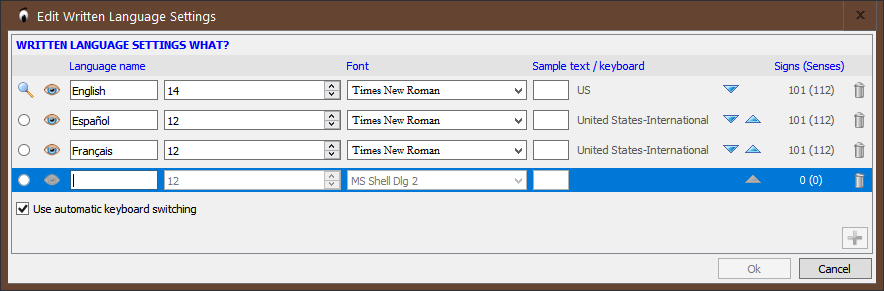
Fill in the information for the new language.
To save the new language, click . If you change your mind and decide not to add the language, click .
Click the![]() trash can next to the language you want to delete (#11 in the pictures above).
trash can next to the language you want to delete (#11 in the pictures above).
If that language is used by any signs in the dictionary project, either for glosses or notes, then you will get a warning.
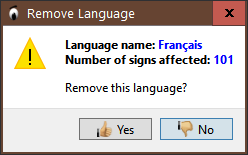
Be careful! If you choose “Yes” (and later choose ), all the glosses and notes in that written language will also be deleted. (If all you want to do is to hide the language, click the ![]() open eye and the language will disappear.)
open eye and the language will disappear.)
Then the language will be in red strike-through text, to warn you what will be deleted.

To finish deleting the language and all the information in that language, click . If you change your mind and want to keep the language, click .
Created with the Personal Edition of HelpNDoc: Powerful and User-Friendly Help Authoring Tool for Markdown Documents